Your Cart is Empty
Whether you have kids with allergies or you’re simply looking for additive free Easter treats, I hope you’ll find this list of really, really simple Easter treats pretty handy. I can honestly tell you that I spend about 20 minutes making the first three items and then about the same making items four to six – super simple, fun and pretty rewarding.
Now I’m not for a second suggesting you make all of these and fill your house with chocolate (although you can if you like chocolate - I'm not going to judge because I made it all haha). I’ve given you this many options so you can play around with what might appeal to your kids or people you are making them for.
For these ideas I used Enjoy Life Mega Chunks but you can use whatever chocolate you like. If there are no allergies involved feel free to use a regular dairy chocolate that is additive free. I just used one bag of 288g for each batch of treats I made.
First you need to get out the ingredients you will need so you’re organised once the chocolate is melted. Get your other ingredients, baking paper, containers, moulds etc ready to go.
I melted my chocolate in a double boiler on the stove. You need to be careful not to get any water in at all or you will have problems. If you melt the chocolate in the microwave make sure you only do it on 50% power and in small bursts like 30 seconds up to a minute.
Here’s how I made each item:
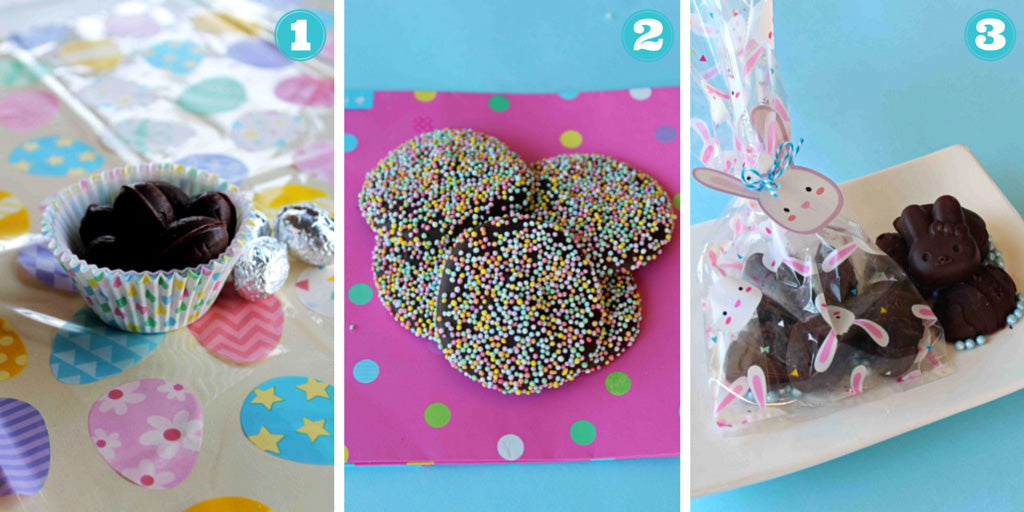
1. Get yourself some chocolate moulds that will make small hunting eggs. Simply pop your chocolate in using a small spoon and make sure they are not overfilled. Once set, pop them out and join together with melted chocolate – I used a silicone pastry brush to spread the melted chocolate on. You can wrap these in a bit of regular foil like I have. Last year I got some Easter Wrap foil at Riot for only a few dollars – do you think I could find what was left this year?! Anyway, the trick with the foil is to only just use enough to cover the egg. You don’t need to be too precious and cut the foil or anything, just tear of a piece and wrap it around. These eggs are really handy to have ready to go in the last week of school so when the teachers asks for something for your child with allergies you’re organised! They’re also lovely on your Easter cakes and cupcakes as a decoration, and perfect if you have an Easter hunt.
2. Freckles are so easy. Just put a small spoonful of chocolate on a tray with some baking paper on it. Spread it into a circle and then sprinkle with Hopper 100s & 1000s. You can make these any size you like of course. Mine are about 5cm diameter.
3. Honeycomb chocolate. Here I simply stirred some Hopper Hokey Pokey through the chocolate and spooned into some silicone moulds. What could be easier than that?

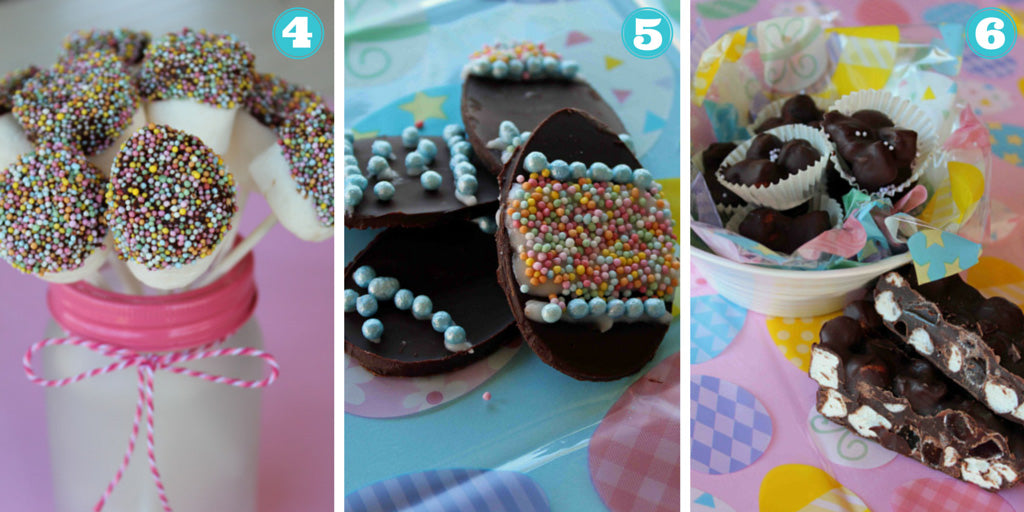
4. How pretty do these look? Just grab a bag of additive free marshmallows. Dip them in the melted chocolate to about a third of the way down. Gently shake off any excess and then roll in Hopper 100s & 1000s. I popped them on a plate in the fridge with the chocolate side up and then once set I gently pushed some cake pop sticks into them.
5. These flat Easter eggs could be decorated in so many ways! I just spread the melted chocolate out to about 2 or 3mm thick on a tray lined with baking paper and set aside in the fridge. When the chocolate was still soft but almost set (this only takes a few minutes) I used my Easter egg cookie cutter to cut out the shapes. Once fully set I decorated. I used a combination of Hopper Pearls and Hopper 100s & 1000s. I actually used a bit of pure icing sugar mixed with water to stick everything on but chocolate would be good too.
6. Rocky road – yum! I just mixed through some mini marshmallows and some chopped up additive free lollies. You can mix anything you like in though such as other additive free lollies, dried fruits, nuts, seeds…....whatever you like!

So I can hear you saying what if my kids can’t have chocolate, or I don’t want them to eat any chocolate or I simply want to give them less chocolate. I am doing a post on non food Easter ideas in a few weeks so I won’t cover that side of things now but I can show you what I came up with.
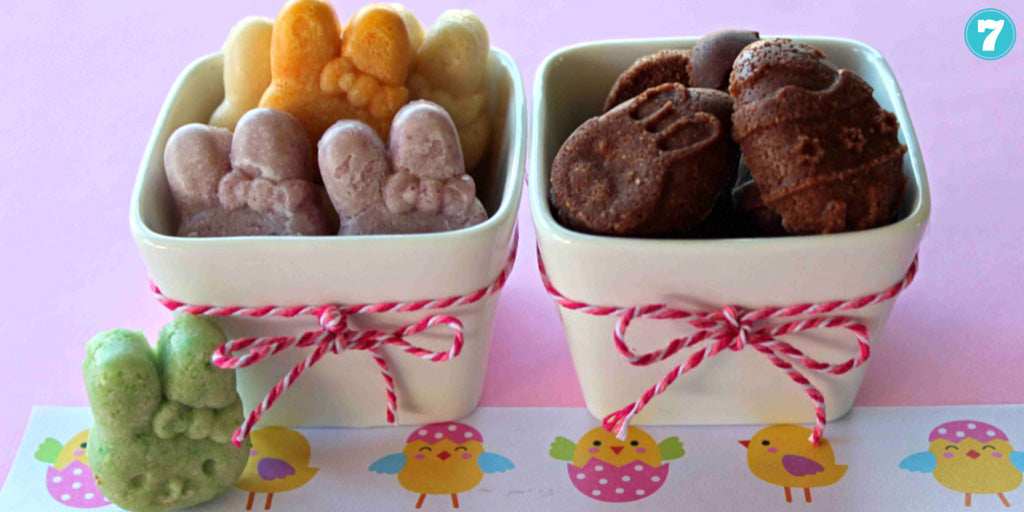
I used the recipe from Wholefood Simply for Coconut Truffles. Then I mixed through some Hopper Natural Food Colours for a bit of fun. I divided up the mixture into three small bowls after I had make a few plain white bunnies and I found the colours mixed through best when I used my hands. I pressed into a silicone mould and put in the fridge to set. The chocolate looking half eggs on the right side of the picture are Wholefood Simply’s Coconut Rough pressed into the mould. If you like this idea have a look online for some other recipes because there are heaps of great recipes with different flavours like this that you could press into moulds. You could even add things like peppermint oil or cacao nibs for gifts for adults.

Keep your chocolates in the fridge in a sealed container so they stay nice and cool and dry.
Enjoy! Lisa x